WiFi. Connecting your Nest Thermostat to your WiFi network is a simple process that can be done in just a few steps. By following these installation instructions, you will have your smart thermostat up and running in no time, allowing you to control and monitor your home’s temperature from anywhere. Let’s get started!
Key Takeaways:
- Ensure Compatibility: Before connecting your Nest Thermostat to WiFi, make sure it is compatible with your system. Check if you have a compatible heating and cooling system.
- Follow the Installation Instructions: Carefully follow the step-by-step installation instructions provided by Nest. This will ensure a smooth and successful setup of your Nest Thermostat.
- Use the Nest App: To connect your Nest Thermostat to WiFi, download the Nest app on your smartphone. This app will guide you through the setup process and allow you to control your thermostat remotely.
Pre-Installation Preparation
Checking Compatibility with Your HVAC System
While preparing to install your Nest Thermostat, the first step is to ensure compatibility with your HVAC system. Assuming you have the model of your current thermostat, you can visit the Nest website to check compatibility using their online tool. This will help you determine if your system is compatible with the Nest Thermostat.
Gathering Required Materials and Tools
While gathering the necessary materials and tools for installation, it’s important to have everything ready before starting the process. Common items you may need include a screwdriver, masking tape, a pencil, a level, and possibly a power drill. Gathering these materials in advance can save you time and ensure a smooth installation process.
Your Nest Thermostat package should also include any specific tools or components needed for installation. Be sure to check the contents of the package and read through the installation instructions provided to familiarize yourself with the process.
Understanding Your Nest Thermostat
Familiarizing Yourself with the Device’s Layout and Buttons
One of the first things you should do when setting up your Nest Thermostat is to familiarize yourself with its layout and buttons. The front of the thermostat features a digital display that shows the temperature and other relevant information. Below the display, you’ll find a metal ring that acts as a dial for navigating through the thermostat’s menu options. Surrounding the ring are buttons that allow you to make selections and adjustments.
Knowing the Different Modes and Features
In the context of understanding your Nest Thermostat, it’s crucial to know the different modes and features it offers. The thermostat has several modes such as heating, cooling, and eco mode. Heating mode is used to heat your home, while cooling mode is for cooling. Eco mode helps you save energy by adjusting the temperature when you’re away. Additionally, your Nest Thermostat comes with features like scheduling, which allows you to set specific temperature settings for different times of the day.
Understanding these modes and features will help you maximize the efficiency of your Nest Thermostat and ensure your home is always at the optimal temperature for your comfort.
Setting Up Your Nest Account
Creating a New Account or Logging in to an Existing One
After successfully installing your Nest Thermostat and connecting it to your WiFi network, the next step is to set up your Nest account. Assuming you don’t have one yet, you will need to create a new account. Simply download the Nest app on your smartphone or visit the Nest website to get started. Follow the on-screen instructions to create your account by providing your email address, creating a password, and verifying your account.
If you already have a Nest account from a previous Nest product or service, all you need to do is log in using your existing credentials. Enter your email and password, and you’ll have access to your account to add your new Nest Thermostat.
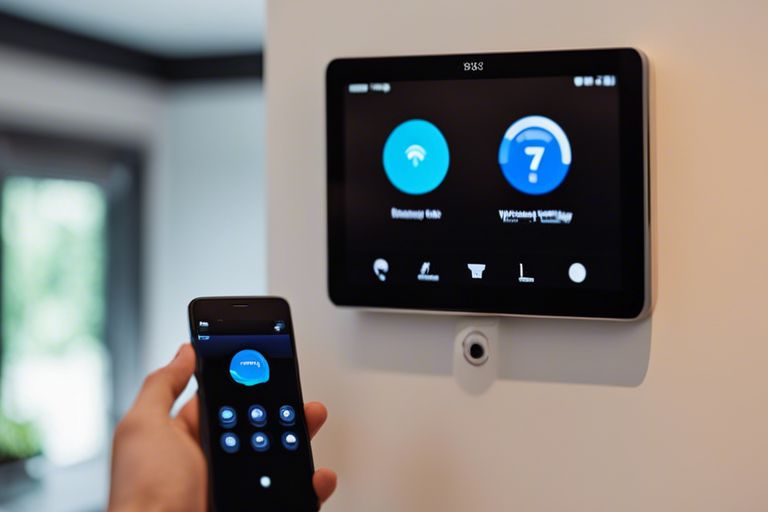
Understanding the Nest App Interface and Menu Options
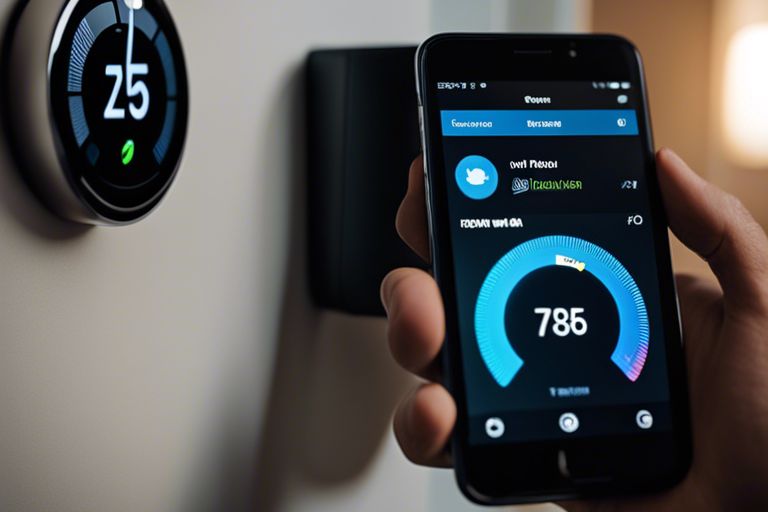
Logging into your Nest account will give you access to the Nest app interface, where you can control and monitor your Nest Thermostat remotely. The app’s main screen will display the current temperature in your home, along with options to adjust the temperature, set schedules, and more. You can also view energy usage reports and receive alerts for any unusual patterns.
A key feature of the Nest app interface is the ability to create personalized schedules for your thermostat. This allows you to set different temperatures for specific times of the day, optimizing energy usage and comfort in your home. You can easily adjust these schedules or make manual changes directly from the app.
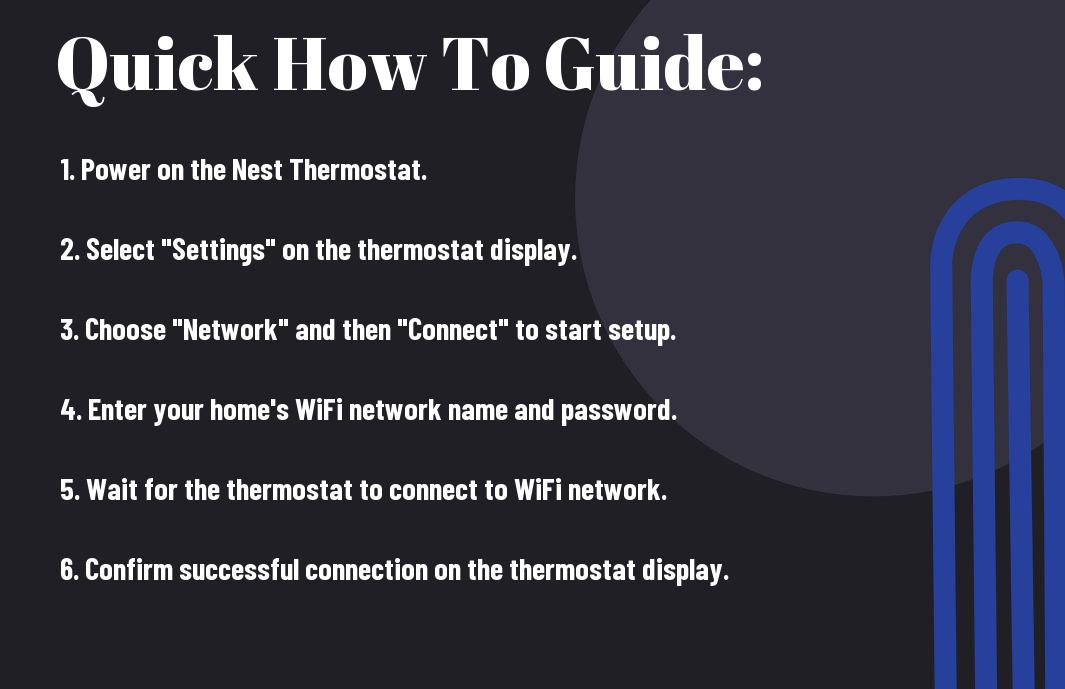
How to Connect Your Nest Thermostat to WiFi
Unlike traditional thermostats, Nest thermostats can be connected to your home WiFi network, allowing you to control the temperature remotely from your smartphone or computer. Connecting your Nest thermostat to WiFi is a simple process that can be done in just a few steps.
Step-by-Step Instructions for Connecting to Your Home Network
Clearly follow these steps to connect your Nest thermostat to your home network:
| Step 1 | On your thermostat, go to the main menu. |
| Step 2 | Select “Settings” and then choose “Network,” followed by “Connect.” |
| Step 3 | Enter your WiFi network name and password when prompted. |
| Step 4 | Wait for the Nest thermostat to connect to your WiFi network. |
Troubleshooting Common WiFi Connection Issues
On occasion, you may encounter some common WiFi connection issues when setting up your Nest thermostat. If you have trouble connecting, make sure to check the following:
Connection issues can sometimes arise due to incorrect entry of WiFi credentials, poor signal strength, or network compatibility problems. If you’re having difficulties connecting your Nest thermostat to WiFi, double-check your network name and password, move closer to your WiFi router, and ensure your network is compatible with the Nest thermostat requirements.
Installation Tips and Factors to Consider
Many factors play a crucial role in the successful installation of your Nest Thermostat. Here are some installation tips and factors to consider to ensure a smooth setup process:
Choosing the Right Location for Your Nest Thermostat
Right from the start, it’s important to choose the right location for your Nest Thermostat. Place it where it can easily sense the temperature in your home accurately. Avoid installing it in areas with direct sunlight, drafts, or near appliances that give off heat, as this can affect its performance. Additionally, make sure it’s within a good range of your WiFi router for a strong connection.
The placement of your thermostat can impact its efficiency and your comfort, so take the time to find the optimal location. Once you’ve found the right spot, you can proceed with the installation process confidently.
Ensuring Proper Power Supply and Wiring Connections
Now, let’s talk about ensuring that your Nest Thermostat has the proper power supply and wiring connections. Before starting the installation, make sure to turn off the power to your HVAC system to avoid any electrical mishaps. Familiarize yourself with the wiring in your old thermostat and follow the Nest app’s instructions carefully to connect the wires correctly.
Ensuring that your thermostat is receiving the right power supply and that the wiring connections are accurate is crucial for the successful operation of your Nest Thermostat. If you’re unsure about anything during the wiring process, don’t hesitate to seek professional help to avoid any potential issues down the line. Installing your Nest Thermostat correctly from the get-go will ensure optimal performance and energy efficiency for your home.
Configuring Your Nest Thermostat’s Settings
Setting Up Your Heating and Cooling Schedules
Even though your Nest Thermostat can learn your schedule over time and adjust itself accordingly, setting up your heating and cooling schedules can help ensure your home is comfortable when you need it to be. You can easily set specific temperatures for different times of the day, such as during the morning when you wake up, during the day when you’re at work, and at night when you’re sleeping.
Customizing Temperature Ranges and Energy-Saving Features
You can further customize your Nest Thermostat by setting temperature ranges to help save energy and reduce your utility bills. By setting upper and lower limits for your home’s temperature, the thermostat can work within these boundaries to keep you comfortable while still being energy efficient. You can also enable energy-saving features like Eco Mode, which adjusts the temperature when you’re away to save energy.
When customizing temperature ranges and energy-saving features, you have the flexibility to fine-tune your Nest Thermostat to suit your preferences and lifestyle. By utilizing these options, you can not only stay comfortable but also optimize your energy usage for cost savings and environmental benefits.
Setting Up Your Nest Thermostat
| Setting | Description |
| — | — |
| Heating and Cooling Schedule | Set specific temperatures for different times of the day |
| Temperature Ranges | Customize upper and lower limits for energy efficiency |
| Energy-Saving Features | Enable Eco Mode and optimize energy usage |
More Information on Customizing Temperature Ranges and Energy-Saving Features
A Nest Thermostat offers various energy-saving features that can help you manage your heating and cooling efficiently. By customizing temperature ranges, you can ensure your home is always comfortable without wasting energy. Energy-saving features like Eco Mode can automatically adjust the temperature when you’re away, leading to significant savings on your energy bills over time.
Customizing Your Nest Thermostat
| Feature | Benefit |
| — | — |
| Temperature Ranges | Maintain comfort while saving energy |
| Eco Mode | Automatically adjust temperature for energy efficiency |
Integrating Your Nest Thermostat with Other Smart Devices
Connecting to Amazon Alexa or Google Assistant
Google Assistant or Amazon Alexa can help you control your Nest Thermostat with just your voice commands. To connect your Nest Thermostat to Google Assistant, you will need to enable the Nest skill in the Google Home app. Once linked, you can say commands like “Hey Google, set the temperature to 72 degrees” to adjust your thermostat settings effortlessly.
Using IFTTT Recipes for Enhanced Automation
You can create custom automation recipes using IFTTT (If This Then That) to integrate your Nest Thermostat with other smart devices in your home. For example, you can set up a recipe to automatically adjust the temperature when you leave home, or to turn off the thermostat when a motion sensor detects no activity in the house. This level of automation can enhance your smart home setup and make your life more convenient.
With IFTTT, you can explore a wide range of possibilities to create personalized automation that suits your lifestyle. Whether you want to sync your thermostat with your smart lights, security cameras, or even your calendar events, IFTTT provides endless options for customization and control.
Alexa
By connecting your Nest Thermostat to Amazon Alexa, you can control your home’s temperature using voice commands through any Alexa-enabled device. Simply enable the Nest skill in the Alexa app and link your Nest account to start commanding your thermostat with ease. Say, “Alexa, set the temperature to 68 degrees” to make adjustments without lifting a finger.
Advanced Installation Scenarios
Despite the simplicity of connecting your Nest Thermostat to WiFi, there are advanced installation scenarios you may encounter. Here are a few to consider:
- Installing Multiple Nest Thermostats in a Single Home
- Connecting to a Wired Ethernet Network
Installing Multiple Nest Thermostats in a Single Home
Assuming you have multiple zones in your home and want to install a Nest Thermostat in each zone, you can easily do so. You will need to ensure that each thermostat is set up and connected to your WiFi network individually. In this scenario, each Nest Thermostat will function independently to control the temperature in its respective zone.
| Tip: Make sure to label each thermostat with the zone it controls for easy identification. | Tip: You can use the Nest app to manage and monitor each thermostat separately. |
Connecting to a Wired Ethernet Network
Even if you prefer a wired connection for your Nest Thermostat, you have the option to connect it to your home’s Ethernet network. This can be useful if you have a wired network infrastructure in place and want to ensure a stable connection for your thermostat.
With the wired Ethernet connection, you don’t have to rely on WiFi for the thermostat to communicate with the Nest servers and your mobile devices. This setup can provide added reliability, especially in situations where WiFi signals may be weak or unreliable.
Ethernet connections can also be advantageous in homes where you want to minimize the use of wireless signals for various devices. By connecting your Nest Thermostat via Ethernet, you can keep your WiFi network less congested and potentially improve overall network performance.
Common Installation Mistakes to Avoid
Incorrect Wiring or Power Supply Connections
Supply Now, one common mistake that many people make when installing their Nest Thermostat is incorrectly wiring or connecting the power supply. It is crucial to follow the manufacturer’s instructions carefully and ensure that each wire is connected to the correct terminal. Failure to do so can result in your thermostat not functioning properly or even causing damage to your HVAC system.
Failing to Update Your Nest Thermostat’s Software
Little One critical step that you should not overlook when setting up your Nest Thermostat is updating its software to the latest version. By failing to do so, you may miss out on important features, bug fixes, and security updates. Regularly updating your thermostat’s software ensures that it operates efficiently and keeps your home comfortable.
Common Additionally, updating your thermostat’s software can also help in resolving connectivity issues and improve the overall performance of your Nest Thermostat. Make it a habit to check for software updates regularly to ensure that your device is running smoothly and effectively.
Troubleshooting Common Issues
Resolving WiFi Connectivity Problems
The most common issue users face when connecting their Nest thermostat to WiFi is connectivity problems. If you are having trouble connecting your Nest thermostat to WiFi, try the following steps:
| Issue | Solution |
| Nest thermostat cannot find your WiFi network | Ensure your WiFi network is working and within range. Check for any obstructions that may be blocking the signal. |
| Incorrect WiFi password entered | Double-check the password you entered and ensure it is correct. WiFi passwords are case-sensitive. |
Fixing Errors with Temperature Sensing or Heating/Cooling Functions
If you are experiencing issues with the temperature sensing or heating/cooling functions of your Nest thermostat, you can try the following troubleshooting steps:
| Issue | Solution |
| Inaccurate temperature readings | Check for any obstructions near the thermostat that may be affecting temperature readings. You can also recalibrate the thermostat through the settings. |
| Heating or cooling not turning on | Ensure the thermostat is set to the correct mode (heating or cooling) and that the temperature settings are appropriate. Check your HVAC system to ensure it is functioning correctly. |
Functions such as temperature sensing and heating/cooling control are crucial for the proper functioning of your Nest thermostat. If you continue to experience issues after trying the troubleshooting steps, you may need to contact Nest customer support for further assistance.
Optimizing Your Nest Thermostat’s Performance
Once again, congratulations on successfully connecting your Nest Thermostat to WiFi! Now it’s time to optimize its performance to ensure maximum energy efficiency in your home.
Using Energy History to Identify Areas for Improvement
Assuming you have been using your Nest Thermostat for a while, you can leverage its Energy History feature to identify areas where you can improve energy efficiency. By reviewing the data on your thermostat or the Nest app, you can see when your system is using the most energy and make adjustments to reduce consumption during those times.
Implementing Energy-Saving Features and Schedules
Implementing energy-saving features and schedules on your Nest Thermostat can further enhance its efficiency. By setting specific temperatures for different times of the day (e.g., lower temperatures when you’re away or asleep), you can reduce energy usage without sacrificing comfort. Additionally, features like Early-On can ensure your home reaches the desired temperature at the right time, without wasting energy by running the system for longer periods.
Thermostats with advanced scheduling capabilities, such as the Nest Thermostat, can learn your preferences over time and adjust settings automatically to optimize energy usage. By taking advantage of these features, you can enjoy a comfortable home environment while reducing your energy bills.
Maintenance and Update Tips
All cutting-edge technology requires some level of maintenance to ensure optimal performance. Your Nest Thermostat is no exception. By following some simple maintenance and update tips, you can keep your device running smoothly and efficiently.
- Regularly Updating Your Nest Thermostat’s Software
Assuming you want your Nest Thermostat to function at its best, it’s crucial to regularly update its software. These updates often include bug fixes, new features, and improvements to the device’s performance. To ensure you have the latest software version, you can enable automatic updates in the settings menu. By keeping your thermostat updated, you can enjoy the most up-to-date features and enhancements.
Cleaning and Inspecting Your Device for Optimal Performance
On a routine basis, you should also clean and inspect your Nest Thermostat to maintain its optimal performance. Dust and debris can accumulate over time, affecting the device’s sensors and overall efficiency. You can use a soft, dry cloth to gently clean the exterior of the thermostat and ensure there are no obstructions around it. Additionally, inspect the wiring and connections to make sure everything is secure and in good condition.
Another crucial aspect of maintaining your Nest Thermostat is checking for any signs of wear or damage. If you notice any issues such as a cracked display or unresponsive buttons, it’s important to address them promptly to prevent further damage and maintain the device’s functionality.
Advanced Features and Customization Options
Using the Nest App’s Energy Alerts and Reminders
Options are available to customize your Nest thermostat’s energy alerts and reminders through the Nest app. You can receive notifications when your energy usage is higher or lower than usual, helping you stay on top of your energy consumption. Additionally, you can set reminders to change your air filters or schedule maintenance for your HVAC system, ensuring it runs efficiently.
| Energy Alerts | Reminders |
| Receive notifications for high or low energy usage | Set reminders for air filter changes or HVAC maintenance |
Creating Custom Temperature Ranges and Schedules
While using your Nest thermostat, you can create custom temperature ranges and schedules to suit your lifestyle and preferences. This feature allows you to adjust the temperature settings based on whether you’re home, away, or sleeping, helping you save energy and stay comfortable. You can also create schedules for different times of the day or week, ensuring your home is always at the desired temperature.
Understanding how to use these customization options can help you optimize your energy usage and create a comfortable environment in your home. By taking advantage of the advanced features offered by the Nest thermostat, you can tailor its settings to meet your specific needs and preferences.
| Custom Temperature Ranges | Custom Schedules |
| Create temperature ranges for different times of the day | Schedule temperature adjustments based on your daily routine |
To wrap up
Upon reflecting on the steps outlined above, you now have a good understanding of how to connect your Nest Thermostat to WiFi. By following these installation instructions, you can ensure that your thermostat is properly set up and ready to use. Remember to double-check your WiFi network credentials, place your thermostat in a suitable location, and download the Nest app for easy control of your home’s temperature settings.
Connecting your Nest Thermostat to WiFi is a simple process that can greatly enhance the efficiency and convenience of controlling your home’s temperature. With a stable WiFi connection, you can adjust the settings remotely, create schedules, and even receive energy-saving tips from your thermostat. Enjoy the comfort and convenience of a smart home with your Nest Thermostat connected to WiFi.
Q: What is the first step to connect my Nest Thermostat to WiFi?
A: The first step is to download the Nest app on your smartphone or tablet from the App Store or Google Play Store.
Q: How do I set up my Nest Thermostat with the Nest app?
A: After downloading the Nest app, open it and follow the on-screen instructions to create a Nest account and add your Nest Thermostat to the app.
Q: What should I do if my Nest Thermostat does not connect to my WiFi network?
A: If your Nest Thermostat is not connecting to your WiFi network, try restarting your WiFi router, ensuring the thermostat is within range of the WiFi signal, and checking if your WiFi network is compatible with Nest products.
Q: Can I connect my Nest Thermostat to a 5GHz WiFi network?
A: No, Nest Thermostats can only connect to 2.4GHz WiFi networks. Make sure your WiFi network is set up on the 2.4GHz band for successful connection.
Q: How can I troubleshoot WiFi connection issues with my Nest Thermostat?
A: To troubleshoot WiFi connection issues, restart your thermostat by turning it off and then back on, check if your WiFi network is working properly, and ensure your thermostat is within range of the WiFi signal. You can also contact Nest customer support for further assistance.