There’s nothing more frustrating than having a brand new Canon printer but not being able to connect it to your WiFi. In this guide, you will learn simple and clear steps to easily connect your Canon printer to your WiFi network. Say goodbye to cable clutter and enjoy the convenience of wireless printing in just a few easy steps.
Key Takeaways:
- Ensure correct network settings: Make sure the Canon printer and your WiFi network are properly configured to connect.
- Use WPS button for easy setup: Some Canon printers support WPS (WiFi Protected Setup) for a quick and easy connection to your WiFi network.
- Follow step-by-step instructions: Refer to the user manual or online guides provided by Canon to ensure a smooth and successful printer setup.
Understanding WiFi Connectivity Options
Types of WiFi Connections for Canon Printers
For seamless printing from your Canon printer, it’s important to understand the different WiFi connectivity options available. Canon printers offer various ways to connect to a wireless network, including:
- Wireless Direct Connection
- WPS Connection
- Standard Connection
- Wired Connection
- Bluetooth Connection
Perceiving the advantages and requirements of each connection type can help you choose the most suitable option for your printing needs.
| With Wireless Direct Connection | You can print directly from your mobile device without the need for a router. |
| With WPS Connection | You can quickly connect your printer to the WiFi network by pressing the WPS button on your router. |
| With Standard Connection | You can connect your printer to the network manually by entering the WiFi network details. |
| With Wired Connection | You can connect your printer directly to the router using an Ethernet cable. |
| With Bluetooth Connection | You can print from devices that support Bluetooth connectivity. |
Benefits of Connecting Your Canon Printer to WiFi
There’s a multitude of benefits that come with connecting your Canon printer to WiFi. First and foremost, wireless printing allows you to print from anywhere within the WiFi network range, eliminating the need for cumbersome cables and making printing more convenient. Additionally, WiFi connectivity enables multiple users to easily access the printer, promoting seamless collaboration in a shared workspace.
The convenience of wireless printing extends to printing directly from your mobile devices such as smartphones and tablets. With the Canon PRINT app, you can effortlessly print or scan documents and photos from your mobile device, even if you’re not physically near the printer. The flexibility and ease of use that WiFi connectivity offers can significantly enhance your printing experience.

Preparing Your Canon Printer for WiFi Connection
Checking the Printer’s WiFi Capability
Any modern Canon printer model should come equipped with WiFi capability, but it is always a good idea to double-check before attempting to connect it to your wireless network. You can do this by looking at the printer’s manual or checking the manufacturer’s website for specifications on your specific printer model. Some older printer models might not have built-in WiFi, so you may need to use alternative connectivity options.
Gathering Required Information and Equipment
An important step before connecting your Canon printer to WiFi is gathering all the necessary information and equipment. Make sure you have the WiFi network name (SSID) and password handy. Additionally, ensure that your printer is within range of your WiFi router for a stable connection. You will also need a computer or mobile device with WiFi capability to access the printer settings and complete the connection process.
WiFi connection for your Canon printer requires the SSID and password of your wireless network. This information is necessary for establishing a secure connection between your printer and the WiFi network. Make sure to have this information readily available before starting the setup process.
Checking
Before proceeding with the WiFi setup, it is crucial to double-check that your printer is turned on and in a ready state. Ensure that there are no error messages displayed on the printer’s control panel that may hinder the WiFi connection process. Additionally, ensure that your computer or mobile device is also connected to the same WiFi network to effectively communicate with the printer.
How to Connect Canon Printer to WiFi Using WPS Method
Enabling WPS on Your Router
Even though the WPS method may seem like a complex process, it’s actually quite simple. To start, locate the WPS button on your WiFi router. This button is usually labeled “WPS” and is typically found on the front or back panel of the router.
Next, press the WPS button on your router. You should see a light flashing, indicating that the WPS functionality has been activated. This light will typically stay on for a few minutes, during which you need to proceed with the connection setup on your Canon printer.
Connecting Your Canon Printer to WiFi Using WPS Button
On your Canon printer, locate the WPS button. This button is usually found on the top or side panel of the printer. Press and hold the WPS button on the printer for a few seconds until you see the WiFi light start to blink.
To complete the connection, wait for the printer to establish a connection with the WiFi network. Once connected, the WiFi light on your Canon printer will stop blinking and remain steady. This indicates that your Canon printer is now successfully connected to the WiFi network using the WPS method.
How to Connect Canon Printer to WiFi Using Standard Connection Method
Accessing Your Printer’s Control Panel
Many Canon printers have a control panel that allows you to navigate through various settings and options. To connect your Canon printer to WiFi, start by accessing the control panel. Look for the setup button, which is usually represented by a wrench icon or the word “Setup” on the panel.
Selecting WiFi as the Connection Method
On the control panel, navigate to the network settings or setup menu. Look for the option to choose a new WiFi network or connect to an existing one. Select WiFi as the connection method, and your Canon printer will start searching for available networks in the vicinity.
To complete the process of connecting your Canon printer to WiFi, you will need to input the WiFi network password. This is the same password you use to connect your other devices, such as your smartphone or laptop, to your WiFi network. Once you enter the password, your Canon printer will establish a connection to the chosen WiFi network, allowing you to print wirelessly from your devices.
Tips for Troubleshooting Common WiFi Connection Issues
All set to connect your Canon printer to WiFi, but facing some roadblocks? Don’t worry; we’ve got you covered with some handy tips to troubleshoot common WiFi connection issues that may arise.
- Check if your WiFi network is working properly by connecting another device to it.
- Ensure that your Canon printer is within the WiFi range to establish a stable connection.
- Verify that the WiFi network name and password entered on the printer are correct.
- Restart your Canon printer and WiFi router to refresh the connection.
Resolving IP Address Conflicts
You may encounter IP address conflicts when multiple devices on the same network have the same IP address assigned. This can hinder the connection between your Canon printer and WiFi network. To resolve this, you can try assigning a static IP address to your printer within the network settings.
By setting a unique IP address for your Canon printer, you can avoid conflicts and ensure a smooth WiFi connection. Remember to choose an IP address that is not already in use by other devices on the network to prevent any conflicts.
Dealing with Weak WiFi Signals
While setting up your Canon printer with WiFi, weak signals can lead to unstable connections and printing issues. If you notice a weak WiFi signal in the area where your printer is located, you can try repositioning the printer closer to the router to improve the signal strength.
With a stronger WiFi signal, your Canon printer can establish a more reliable connection, ensuring smooth printing operations without interruptions. Make sure there are no obstructions or interference causing the weak signal, and position your printer in a spot where the WiFi signal is strong.
Factors to Consider for a Stable WiFi Connection
After successfully connecting your Canon printer to WiFi, it’s important to ensure a stable connection for seamless printing. Here are some factors to consider:
Physical Obstacles and Interference
Assuming you are facing connectivity issues, check for physical obstacles such as walls, large furniture, or metal objects that may weaken the WiFi signal to your printer. Additionally, electronic devices like cordless phones and microwave ovens can cause interference, affecting the connection. To improve the signal strength, try moving your printer closer to the router and removing any obstructions in between.
- Place your Canon printer in a central location to your WiFi router to minimize signal interference.
- Avoid placing your printer near other electronic devices that emit wireless signals to maintain a stable connection.
Router Placement and Configuration
An optimal router placement and configuration are crucial for a stable WiFi connection. Make sure your router is placed at a higher location and away from walls for better signal distribution. Additionally, ensure that your router’s firmware is up to date to support the latest WiFi standards for improved performance.
Configuration of your router settings, such as changing the channel or frequency band, can also help in reducing interference and creating a more reliable connection for your Canon printer.
Recognizing these factors and implementing the appropriate solutions can help you maintain a stable WiFi connection for your Canon printer, ensuring consistent and hassle-free printing.
How to Connect Canon Printer to WiFi on Windows
Installing the Canon Printer Driver
Not sure where to start? The first step in connecting your Canon printer to WiFi on Windows is to install the necessary printer driver. Simply visit the Canon official website, locate the driver for your specific printer model, and download it onto your Windows computer. Follow the on-screen instructions to complete the installation process. Once the driver is installed, your computer will be able to communicate with the printer over the WiFi network.
Configuring the Printer’s WiFi Settings on Windows
Not sure how to configure the WiFi settings of your Canon printer on Windows? Don’t worry, it’s a simple process. First, make sure your printer is turned on and connected to the same WiFi network as your computer. Next, open the Control Panel on your Windows computer and navigate to the Devices and Printers section. Locate your Canon printer, right-click on it, and select Printer Properties. In the Properties window, click on the Ports tab and then select Add Port. Choose Standard TCP/IP Port and follow the on-screen instructions to input your printer’s IP address. Once the port is added, your printer will be connected to the WiFi network on your Windows computer.
Configuring the WiFi settings of your Canon printer on Windows allows you to easily print wirelessly from any device connected to the same network. This convenient setup eliminates the need for cables and enables seamless printing from anywhere within the WiFi range. Ensure that both your printer and computer are connected to the same network for smooth printing operations.
How to Connect Canon Printer to WiFi on Mac
Installing the Canon Printer Driver on Mac
Connect your Canon printer to your Mac using a USB cable. Turn on the printer and your Mac. Your Mac should automatically detect the printer and prompt you to download the necessary drivers. Follow the on-screen instructions to complete the driver installation. Once the drivers are installed, you can proceed to configure the printer’s WiFi settings.
Configuring the Printer’s WiFi Settings on Mac
Little do you have to go through the printer’s menu on the machine itself to connect it to WiFi. On your Mac, go to System Preferences and select Printers & Scanners. Click on the ‘+’ icon to add a new printer. Your Canon printer should appear in the list of available printers. Select your printer and click ‘Add’. Follow the prompts to connect your printer to your WiFi network. Once the connection is established, you can print wirelessly from your Mac to the Canon printer.
For instance, if your printer has a touchscreen display, you may be able to input your WiFi network password directly on the printer. This makes the setup process even more straightforward as you don’t have to rely solely on your Mac to establish the WiFi connection.
How to Connect Canon Printer to WiFi Using the Canon Print App
Downloading and Installing the Canon Print App
Even if you are new to using apps, downloading and installing the Canon Print App is straightforward. Start by opening the App Store or Google Play Store on your mobile device. Search for the Canon Print App and click on the download button. Once the app is downloaded, follow the on-screen instructions to install it on your device. Make sure to grant any necessary permissions for the app to function correctly.
Connecting Your Printer to WiFi Using the App
Printer Once the Canon Print App is installed on your device, open it and follow the step-by-step instructions to connect your Canon printer to WiFi. The app will automatically detect your printer model and guide you through the setup process. You will need to input your WiFi network’s name and password when prompted. Once entered, the app will send the WiFi information to your printer, allowing it to connect to your network.
Canon By using the Canon Print App to connect your printer to WiFi, you can easily manage print settings, monitor ink levels, and even print remotely from your mobile device. This convenient app provides a seamless way to ensure your Canon printer is connected to your WiFi network for efficient printing tasks.
How to Connect Canon Printer to WiFi Using the Printer’s LCD Screen
Navigating the Printer’s LCD Screen
For connecting your Canon printer to WiFi using the printer’s LCD screen, you first need to navigate through the menu options on the display. You will find the settings menu on the LCD screen which will allow you to access the WiFi setup options.
Selecting WiFi as the Connection Method
Even though the exact steps may vary depending on the model of your Canon printer, generally, you will need to select WiFi as the connection method from the available options on the LCD screen. Once you have selected WiFi, the printer will prompt you to enter your WiFi network name (SSID) and password.
For a seamless connection process, make sure to have your WiFi network name and password ready. Once you input the correct WiFi credentials, the printer will attempt to connect to your WiFi network automatically.

Securing Your Canon Printer’s WiFi Connection
Setting Up a Secure WiFi Network
Even though connecting your Canon printer to WiFi offers convenience, it’s imperative to prioritize security to protect your printer and network from potential threats. Begin by securing your WiFi network with a strong password that includes a mix of letters, numbers, and special characters. Make sure to change the default network name (SSID) to something unique that doesn’t reveal personal information.
Configuring Printer Settings for Secure Printing
Setting up your Canon printer with secure printing features is crucial to safeguard your documents and prevent unauthorized access. You can enhance security by enabling features such as printer password protection, encryption protocols like WPA2, and setting up access controls to limit who can print remotely. Regularly update your printer firmware to ensure it has the latest security patches and improvements.
This step is important as it adds an extra layer of protection to your printer and ensures that only authorized users can access and use the device.
Common Errors and Solutions When Connecting Canon Printer to WiFi
Error Messages and Their Meanings
With technology, there can often be error messages that may seem cryptic at first. When setting up your Canon printer to connect to WiFi, you may encounter messages like “No AirPrint Printers Found” or “Printer Not Found”. These messages usually indicate that there is an issue with the printer’s connection to the wireless network.
Resolving Connection Issues
Canon printers can sometimes have trouble connecting to WiFi due to various reasons such as network issues, incorrect settings, or interference. If you are facing connectivity problems, ensure that your printer is within the WiFi range and that the network is functioning properly. You can also try restarting your router and printer, as well as checking the WiFi password you entered.
Canon printers often come with troubleshooting tools or guides that can help you diagnose and resolve connection issues. It’s also a good idea to check Canon’s official website for specific instructions related to your printer model.
Advanced Tips for Optimizing Your Canon Printer’s WiFi Performance
Keep in mind that there are a few advanced tips you can utilize to optimize your Canon printer’s WiFi performance. By fine-tuning some settings on your router and prioritizing printing tasks, you can ensure a smoother and more efficient printing experience.
- Optimizing Router Settings for Better Performance
For Optimizing router settings for better performance, you can consider changing the channel width to reduce interference, enabling Quality of Service (QoS) for prioritizing printer traffic, and updating the firmware to the latest version. - Using Quality of Service (QoS) for Priority Printing
Tips By enabling Quality of Service (QoS) on your router, you can prioritize printer traffic over other devices on the network, ensuring that printing tasks are completed efficiently without delays.
Optimizing Router Settings for Better Performance
For optimizing router settings for better performance, you can consider changing the channel width to reduce interference, enabling Quality of Service (QoS) for prioritizing printer traffic, and updating the firmware to the latest version. By adjusting the channel width to a narrower bandwidth, you can minimize signal overlap and improve the connection stability for your printer. Enabling QoS on your router allows you to assign priority to printing tasks, ensuring that they are processed without delays even when other devices are using the network heavily. Additionally, keeping your router’s firmware up to date can address any known issues that may affect the performance of your Canon printer over WiFi.
Using Quality of Service (QoS) for Priority Printing
Tips for using Quality of Service (QoS) for priority printing involve configuring your router to prioritize printer traffic by assigning it a higher bandwidth allocation. This ensures that when you send a print job to your Canon printer, it is processed without interruptions or delays caused by other devices competing for bandwidth on the network. By giving precedence to printing tasks through QoS settings, you can optimize the performance of your Canon printer over WiFi and experience smoother printing operations.
To wrap up
Drawing together the steps outlined in this guide will help you successfully connect your Canon printer to WiFi. Ensuring that your printer and WiFi network are compatible, entering the correct network password, and following the printer’s manual or online instructions will make the process smooth and efficient. Remember to check the connection by printing a test page to confirm that your printer is properly connected to the WiFi network.
By following these easy instructions, you can enjoy the convenience of wirelessly printing from your Canon printer. Should you encounter any issues during the setup process, referring to the troubleshooting section in your printer’s manual or seeking assistance from Canon’s customer support are both valuable resources that can help resolve any connectivity problems. Enjoy the freedom that comes with printing wirelessly from any device on your network once your Canon printer is connected to WiFi successfully!
FAQ
Q: Why is it important to connect my Canon printer to WiFi?
A: Connecting your Canon printer to WiFi allows you to print wirelessly from any device connected to the same network, providing convenience and flexibility.
Q: How do I find the WiFi network name (SSID) and password for my Canon printer?
A: You can find the WiFi network name (SSID) and password on the label attached to your router. It is usually labeled as the “Network Name” and “Password” or “WPA Key”.
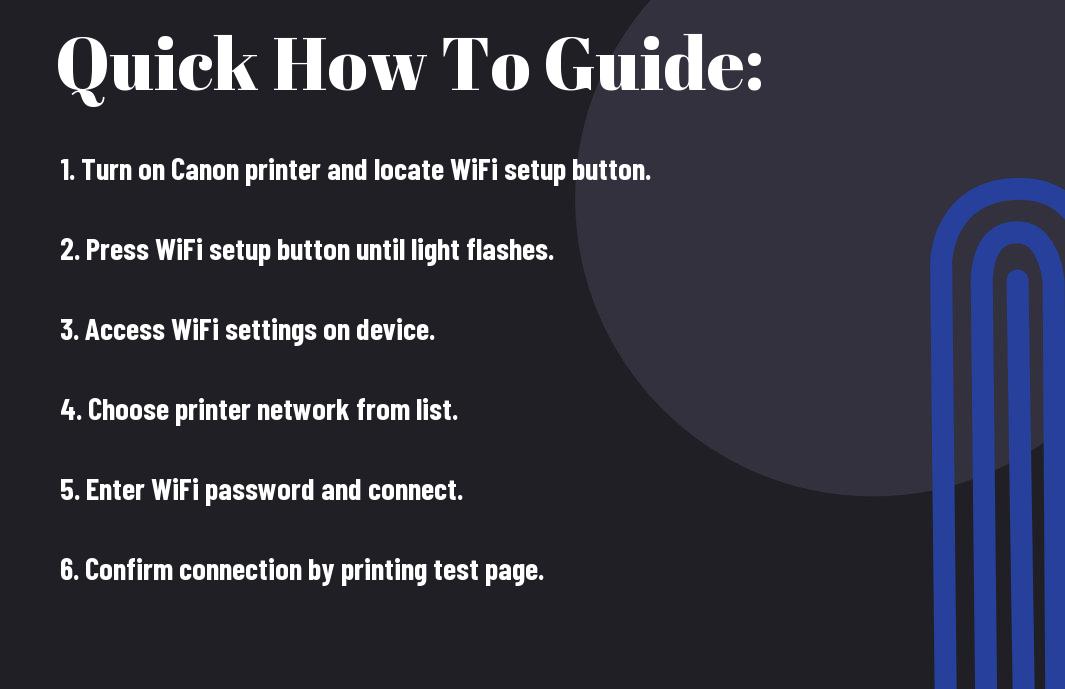
Q: What are the steps to connect my Canon printer to WiFi?
A: The steps to connect your Canon printer to WiFi may vary depending on the model, but generally, you can do this by accessing the printer’s settings menu, selecting the WiFi option, choosing your network, and entering the password.
Q: How can I troubleshoot common issues when connecting my Canon printer to WiFi?
A: If you encounter any issues when connecting your Canon printer to WiFi, try restarting your printer and router, ensuring the correct network name and password are entered, and moving the printer closer to the router to improve signal strength.
Q: Are there any alternative methods to connect my Canon printer to WiFi?
A: Yes, you can also connect your Canon printer to WiFi using the WPS (WiFi Protected Setup) method, which allows you to connect the printer to the network with the push of a button on the router.