Most Google Home devices require a stable internet connection to function properly. In this guide, you will learn quick and easy tips on how to connect your Google Home to WiFi, ensuring a hassle-free setup process. By following these steps, you can have your Google Home up and running in no time, ready to assist you with your tasks and inquiries seamlessly.
Key Takeaways:
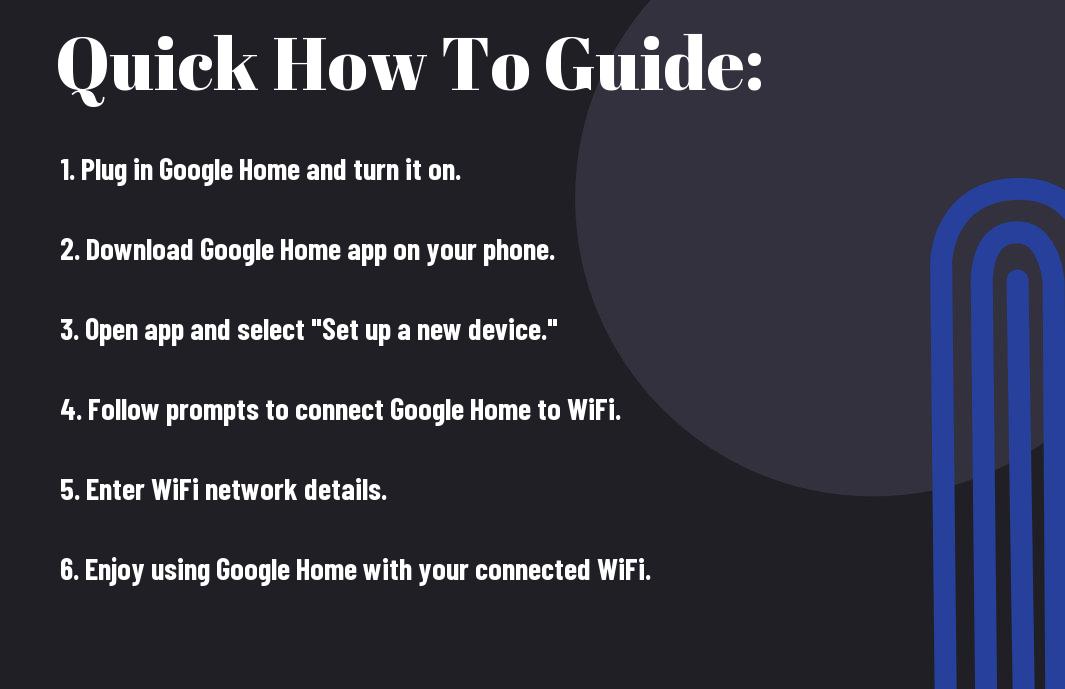
- Ensure Google Home is Powered On: Before starting the setup process, make sure your Google Home device is powered on and ready.
- Use the Google Home App: To connect Google Home to WiFi, download and open the Google Home app on your smartphone or tablet.
- Follow the On-Screen Instructions: The app will guide you through the setup process, including connecting to your WiFi network and configuring your Google Home device.
Understanding the Requirements for Connecting Google Home to WiFi
Checking the Compatibility of Your Router and Google Home Device
As you prepare to connect your Google Home to WiFi, it’s important to ensure that your router is compatible with the device. Google Home requires a router that supports 802.11 a/b/g/n/ac Wi-Fi protocols. Make sure your router meets these specifications to enable a successful connection.
Ensuring a Stable Internet Connection
Device placement is crucial to maintaining a stable internet connection for your Google Home. Ensure that your device is within an optimal range from your WiFi router to avoid interference or signal disruptions. Additionally, minimizing obstacles between your router and Google Home can help maintain a strong and stable connection.
Another important factor in ensuring a stable internet connection is to avoid placing your Google Home near electronic devices that may cause interference, such as microwaves or Bluetooth devices. These can disrupt the WiFi signal and lead to connectivity issues.
Preparing Your Google Home Device for WiFi Setup
Unboxing and Physically Setting Up Your Google Home Device
Home Assistant: When you first receive your Google Home device, unbox it carefully and make sure all the components are present. You will generally find the Google Home device itself, a power adapter, and a user manual in the box. Place your Google Home in a central location in your home where it can easily hear your voice commands.
Downloading and Installing the Google Home App
With the Google Home app, you can set up, manage, and control your Google Home devices from your smartphone or tablet. To get started, download the Google Home app from the App Store (for iOS devices) or the Google Play Store (for Android devices). Install the app on your mobile device, and then follow the on-screen instructions to create a Google account or sign in with your existing one.
Your Google Home device will need to be connected to the same Wi-Fi network as your mobile device for the setup process to work smoothly. Ensure that both devices are connected to the network before proceeding with the setup in the Google Home app. Follow the prompts in the app to add your Google Home device and connect it to your Wi-Fi network.
Factors Affecting WiFi Connectivity for Google Home
Once again, there are several factors that can impact the WiFi connectivity between your Google Home device and your network. Understanding these factors can help you troubleshoot any issues quickly and efficiently. Here are some key factors to consider:
Distance Between the Router and Google Home Device
WiFi signals weaken as they travel further from the router. The distance between your router and the Google Home device can affect the strength of the WiFi connection. If the distance is too great, you may experience connectivity issues.
Perceiving optimal placement for your Google Home device within your home can help ensure a stable WiFi connection. Placing your device in a central location, away from walls and obstructions, can improve signal reception.
Physical Obstacles and Interference
Interference from physical obstacles such as walls, floors, and large appliances can disrupt WiFi signals. Common household items like mirrors, metal objects, and electronic devices can also interfere with the signal.
To minimize interference, try to place your router in a central location in your home and away from other electronic devices. Additionally, positioning your Google Home device away from potential sources of interference can help improve connectivity.
WiFi Network Congestion and Bandwidth
Any network congestion can impact the performance of your Google Home device. If multiple devices are connected to the same network and using bandwidth-intensive applications, it can slow down the WiFi connection for your Google Home.
Avoiding running bandwidth-heavy applications on multiple devices simultaneously can help alleviate network congestion and ensure a stable connection for your Google Home device.
Quick Tips for Optimizing Your WiFi Network for Google Home
Despite setting up your Google Home device correctly, you may encounter connectivity issues if your WiFi network is not optimized. Here are some quick tips to ensure your network is ready to support Google Home seamlessly:
- Using a Dual-Band Router for Improved Performance
- Changing the WiFi Channel to Reduce Interference
- Upgrading Your Router’s Firmware for Better Compatibility
Using a Dual-Band Router for Improved Performance
Tips on optimizing your WiFi network for Google Home include using a dual-band router. These routers operate on both the 2.4GHz and 5GHz frequency bands, allowing you to allocate devices accordingly for better performance. By connecting your Google Home device to the less congested 5GHz band, you can experience improved connectivity and faster data transfer speeds. Make sure to check your router settings and connect your Google Home to the appropriate band for optimal performance.
Changing the WiFi Channel to Reduce Interference
Any wireless network can suffer from interference, which can impact the performance of your Google Home device. By changing the WiFi channel on your router, you can reduce interference from other devices in your area operating on the same channel. This simple adjustment can lead to a more stable connection and smoother operation for your Google Home.
Quick adjustment of the WiFi channel can be done through your router’s settings. Log in to your router’s admin panel and look for the WiFi channel settings. Experiment with different channels to find the one with the least interference and best performance for your Google Home device.
Upgrading Your Router’s Firmware for Better Compatibility
Reduce the risk of connectivity issues with your Google Home by upgrading your router’s firmware. This ensures that your router is equipped with the latest features and security updates, improving compatibility with smart devices like the Google Home. A simple firmware update can enhance the stability and performance of your WiFi network, providing a seamless experience when using your Google Home device.
This imperative maintenance task can usually be performed through your router’s admin panel. Check the manufacturer’s website for instructions on how to download and install the latest firmware version for your specific router model. By keeping your router up to date, you can ensure optimal performance for your Google Home and other connected devices.
Setting Up Google Home on Your WiFi Network
Opening the Google Home App and Starting the Setup Process
For setting up your Google Home on your WiFi network, the first step is to open the Google Home app on your smartphone or tablet. Make sure your device is connected to the same WiFi network you want to connect your Google Home to. Once the app is open, tap on the “+” symbol to add a new device and select “Set up device” to begin the process.
Entering Your WiFi Network Password and Completing the Setup
Some networks may require you to enable a setting called AP isolation, which prevents devices on the same network from communicating with each other. If your network has this setting enabled, you may need to disable it temporarily to allow Google Home to connect.
After selecting your device from the list, you will be prompted to enter the password for your WiFi network. Simply enter the password and follow the on-screen instructions to complete the setup process. Once your Google Home is connected to your WiFi network, you can start using it to control smart devices, play music, and access various other features.
Completing the Setup
Completing the setup process will ensure that your Google Home is connected securely to your WiFi network, allowing you to enjoy all its features without any interruptions. Once set up, you can control your Google Home using voice commands and manage its settings through the Google Home app on your mobile device.
Troubleshooting Common WiFi Connectivity Issues with Google Home
Resolving Connection Drops and Intermittent Connectivity
While Google Home is designed to seamlessly connect to your WiFi network, you may encounter issues like connection drops or intermittent connectivity. If you notice your Google Home frequently disconnecting from WiFi, try moving it closer to your router to see if the signal improves. Additionally, make sure there are no physical obstacles blocking the WiFi signal between your Google Home and the router.
Fixing Issues with Weak WiFi Signals and Dead Zones
Home WiFi signals can sometimes be weak, leading to connectivity issues with your Google Home. If you are facing problems in certain areas of your home where the WiFi signal is weak or there are dead zones, consider installing a WiFi range extender or a mesh WiFi system. These devices can help boost the WiFi signal strength and ensure better connectivity for your Google Home throughout your home.
A strong and stable WiFi connection is crucial for the optimal performance of your Google Home. If you are experiencing persistent connectivity issues due to weak WiFi signals or dead zones, investing in a reliable WiFi solution can significantly improve your overall smart home experience.
Dealing with Router Incompatibility and Firmware Issues
Resolving router incompatibility or firmware issues can also help enhance the connectivity of your Google Home. Make sure your router firmware is up to date and compatible with Google Home requirements. If you continue to experience connectivity issues, you may need to contact your router manufacturer for further assistance or consider upgrading to a newer router model that is compatible with Google Home.
With the increasing complexity of home networks and smart devices, ensuring that your router is compatible and running the latest firmware is imperative for a seamless and stable connection with your Google Home.
How to Change Your WiFi Network on Google Home
Accessing the Google Home App Settings and WiFi Options
Not sure how to change the WiFi network on your Google Home? Don’t worry, it’s a simple process. To begin, open the Google Home app on your smartphone or tablet.
Now, locate the device you want to update the WiFi network for and tap on it. This will take you to the device settings where you can access the WiFi options.
Selecting a New WiFi Network and Entering the Password
Your next step is to select a new WiFi network for your Google Home device. Within the device settings, look for the WiFi option and tap on it. You will then see a list of available WiFi networks.
This is where you can choose your new network from the list and enter the password to connect your Google Home to the updated WiFi network. Make sure to type in the correct password to ensure a successful connection.
Understanding WiFi Network Security for Google Home
Many smart devices, including Google Home, rely on connecting to WiFi networks for functionality. It is necessary to understand the importance of securing your WiFi network to protect your personal information and prevent unauthorized access to your devices.
The Importance of WPA2 Encryption and Strong Passwords
There’s a reason why WPA2 encryption is the recommended security protocol for WiFi networks. WPA2 provides a strong level of encryption that helps keep your network secure from potential intruders. When setting up your WiFi network for Google Home, make sure to enable WPA2 encryption and choose a strong, unique password. Avoid using common passwords like “password” or “123456” and opt for a combination of letters, numbers, and special characters to create a robust password.
Enabling Two-Factor Authentication for Added Security
While setting up your Google Home, consider enabling two-factor authentication for an added layer of security. Two-factor authentication requires you to provide an additional verification method, such as a one-time code sent to your phone, along with your password when accessing your Google account. This extra step can help prevent unauthorized access to your Google Home devices, even if your password is compromised.
Importance
Regularly Updating Your Router’s Firmware for Security Patches
Some routers may have vulnerabilities that hackers can exploit to gain access to your network. It is crucial to regularly update your router’s firmware to ensure that any security flaws are patched promptly. Check your router manufacturer’s website for firmware updates and install them as soon as they are available to keep your network secure.
Passwords
By following these security practices and staying vigilant with your WiFi network’s security measures, you can protect your Google Home and other smart devices from potential cyber threats. Keep in mind, the security of your WiFi network is in your hands, so take the necessary steps to keep it safe and secure.
Tips for Improving WiFi Coverage and Range for Google Home
Many factors can affect the WiFi coverage and range for your Google Home device. Here are some tips to help you improve your WiFi connection:
- Using WiFi Range Extenders and Access Points
- Optimizing Your Router’s Placement and Antenna Orientation
- Upgrading to a Mesh WiFi Network for Whole-Home Coverage
Using WiFi Range Extenders and Access Points
WiFi range extenders and access points can help boost your WiFi signal strength and reach in areas where your Google Home may have connectivity issues. By strategically placing these devices throughout your home, you can create a network that provides better coverage and reduces dead zones. Perceiving where your WiFi signal is weak can help you determine the best placement for these devices.
Optimizing Your Router’s Placement and Antenna Orientation
Little adjustments to your router’s placement and antenna orientation can make a big difference in improving your WiFi coverage. For instance, placing your router in a central location in your home and positioning its antennas vertically can help distribute the signal more effectively throughout your space.
Upgrading to a Mesh WiFi Network for Whole-Home Coverage
The upgrade to a Mesh WiFi network can provide seamless coverage for your entire home. Mesh systems use multiple access points that work together to create a single, unified network. This can ensure that you have a strong connection no matter where you are in your home, improving your Google Home’s performance and reliability.
Improving the WiFi coverage and range for your Google Home not only enhances your user experience but also ensures that your device functions optimally for voice commands, streaming music, and controlling smart home devices.
How to Connect Multiple Google Home Devices to WiFi
Setting Up a Single WiFi Network for Multiple Devices
Devices like Google Home speakers need to be connected to the same WiFi network to communicate with each other effectively. When setting up multiple devices, make sure they are all connected to the same WiFi network at home. This will ensure seamless communication and synchronization between the devices, allowing you to control them through voice commands or the Google Home app.
Using a WiFi Network with a Large Number of Devices
One important thing to consider when connecting multiple Google Home devices to WiFi is the capacity of your network. If you have a large number of devices connected to the same network, it’s necessary to ensure that your router can support this many connections without compromising performance. You may consider upgrading to a higher-capacity router or a mesh WiFi system to handle the increased traffic efficiently.
With multiple devices connected to your WiFi network, you may experience potential signal interference or bandwidth issues. To mitigate these problems, ensure that your router is placed in a central location in your home and that firmware updates are regularly performed to optimize performance.
Managing Multiple Devices with the Google Home App
WiFi Managing multiple Google Home devices can be made easier through the Google Home app. You can group your devices together, assign them to specific rooms, and control them collectively using the app. This way, you can easily manage and control all your connected Google Home devices with a few taps on your smartphone.
Home If you have different generations of Google Home devices or smart home products from various brands, the Google Home app allows you to create routines and automate tasks to streamline your connected home experience. By organizing your devices in the app, you can create a customized smart home ecosystem that suits your specific needs and preferences.

Advanced WiFi Settings for Google Home
To enhance your Google Home’s connectivity and performance, you can access advanced WiFi settings. Here are some additional configurations you can explore:
Configuring Quality of Service (QoS) Settings for Priority Traffic
Even with multiple devices connected to your WiFi network, you can prioritize Google Home for seamless performance. By setting up Quality of Service (QoS) rules on your router, you can ensure that voice commands and media streaming are given priority. Here are some steps to configure QoS settings:
| Step 1: Access your router’s settings by typing the IP address into your browser window. | Step 2: Look for QoS or Traffic Control settings within your router’s configuration menu. |
Setting Up Port Forwarding for Remote Access
Even if you’re away from home, you can remotely access your Google Home with the help of port forwarding. By setting this up, you can control your smart devices and manage your routines from anywhere. Here’s how you can set up port forwarding:
Priority: Port forwarding involves redirecting network traffic from external networks to your Google Home, allowing for remote access. This enables you to interact with your smart home devices even when you’re not on the same WiFi network.
Using Static IP Addresses for Advanced Networking
Even for advanced networking needs, setting up static IP addresses can be beneficial. By assigning a fixed IP to your Google Home, you can ensure consistent connectivity and access to your smart home devices. Here’s how you can use static IP addresses:
| Step 1: Access your router’s settings and locate the DHCP section. | Step 2: Find the option to assign a static IP address and enter the details for your Google Home. |
Settings: Assigning a static IP address to your Google Home ensures that the device always receives the same address on your network. This can be helpful for setting up port forwarding and accessing your device remotely.
Service
By managing these advanced WiFi settings for your Google Home, you can optimize its performance and ensure reliable connectivity. Whether you prioritize traffic, set up port forwarding, or use static IP addresses, these configurations can enhance your smart home experience.
Common WiFi-Related Issues with Google Home and How to Fix Them
Resolving Issues with Google Home’s WiFi Connectivity
All set to enjoy your Google Home, but facing WiFi connectivity issues? Don’t worry; you’re not alone. Common issues like weak signals, network interference, or incorrect WiFi details can interrupt your experience. To resolve these problems, start by ensuring that your Google Home device is within a reasonable range of your WiFi router. Sometimes, simply moving the device closer can improve the connectivity.
If proximity isn’t the issue, try restarting your router by unplugging it for about 30 seconds before plugging it back in. Additionally, double-check your WiFi network name and password on the Google Home app to make sure they match. Updating your router’s firmware can also improve compatibility with Google Home and resolve connectivity problems.
Fixing Problems with Voice Commands and Google Assistant
While using voice commands with Google Home is convenient, sometimes issues may arise, causing frustration. If you find that Google Home is not responding to your voice commands as expected, begin by checking the microphone on your device. Dust or debris can hinder its function, so ensure it’s clean and unobstructed. You may also need to adjust the volume settings on your Google Home device by tapping the sides to increase or decrease volume.
Google Home can sometimes struggle to understand commands in noisy environments or when speaking too softly. Speaking clearly and concisely can improve the device’s ability to recognize and respond accurately to your requests.
Troubleshooting Issues with Smart Home Device Integration
Voice commands can sometimes fail to control your smart home devices through Google Home due to compatibility issues or connectivity problems. Ensure that all your smart devices are compatible with Google Home and have been correctly set up in the Google Home app. If you’re facing integration problems, unlink and relink the devices in the app to refresh the connection. Additionally, ensure that your smart devices have the latest firmware updates to avoid compatibility issues.
Home automation can be seamless when all your devices work in harmony. If you encounter integration problems, remember to check for any software updates for both Google Home and your smart home devices. Keeping everything up to date can often resolve integration issues and ensure smooth operation of your connected devices.
Best Practices for Maintaining a Stable WiFi Connection for Google Home
Regularly Restarting Your Router and Google Home Device
An important practice for ensuring a stable WiFi connection for your Google Home is to regularly restart both your router and your Google Home device. Over time, electronic devices can encounter issues that may cause connectivity issues. Restarting them can help clear any temporary issues and reset the connection, providing a fresh start for smoother operations.
Monitoring Your WiFi Network’s Performance and Speed
Home monitoring your WiFi network’s performance and speed can help you identify potential bottlenecks or sources of interference that may impact your Google Home’s connectivity. You can use various tools and apps to check the signal strength, network congestion, and possible sources of interference in your home Wi-Fi network.
For instance, you can use a WiFi analyzer app to scan the network environment and check for signal strength and channel congestion. By monitoring these factors, you can optimize your WiFi setup for better performance and ensure a stable connection for your Google Home.
Keeping Your Google Home App and Firmware Up-to-Date
Monitoring keeping your Google Home app and device firmware up-to-date is crucial for maintaining a stable connection. Regular updates often include bug fixes, security patches, and new features that can enhance the overall performance of your Google Home device. Make sure to check for updates regularly in the Google Home app and install them promptly to ensure optimal functionality.
Your failure to update the app and firmware could result Access new features or improvements to connectivity issues or security vulnerabilities. By keeping everything up-to-date, you can ensure a seamless experience with your Google Home and minimize the chances of encountering connectivity problems.
Conclusion
Now that you have learned how to connect your Google Home device to WiFi using quick setup tips, you can enjoy seamless access to the smart features it offers. By following the simple steps outlined in this guide, you can easily connect your Google Home to your home network and start using voice commands to control your smart home devices, play music, ask questions, and more.
Make sure to keep your WiFi network and Google Home device updated to ensure smooth performance and security. If you encounter any issues during the setup process, refer back to these tips or reach out to Google Home support for assistance. Enjoy the convenience and efficiency of using your Google Home connected to WiFi for all your smart home needs!
FAQ
Q: How do I connect my Google Home to WiFi?
A: To connect your Google Home to WiFi, open the Google Home app on your phone, tap on “Set up device,” select “New devices,” and follow the on-screen instructions to connect your Google Home to your WiFi network.
Q: What should I do if my Google Home is not connecting to WiFi?
A: If your Google Home is not connecting to WiFi, try restarting your router and Google Home device. Make sure your WiFi network is functional and try moving your Google Home closer to the router to improve connectivity.
Q: Can I change the WiFi network my Google Home is connected to?
A: Yes, you can change the WiFi network your Google Home is connected to by going to the Google Home app, selecting the device, and then choosing “WiFi” to connect your Google Home to a different network.
Q: What should I do if I don’t see my WiFi network listed during setup?
A: If you don’t see your WiFi network listed during setup, make sure the network is operational and broadcasting. Try resetting your WiFi router and Google Home device, and then check if the network appears in the list.
Q: Is it possible to connect multiple Google Home devices to the same WiFi network?
A: Yes, you can connect multiple Google Home devices to the same WiFi network. Simply set up each device individually using the Google Home app and connect them to the same WiFi network to control them together.